RestDocs에서 Snippet 파일명 커스텀, Restdocs Link(링크) 걸기
RestDocs에서 파일명은 일반적으로 request(response)-fields, request(response)-body 등의 규칙이 있다.
Snippet 파일은 보통 src/test/resources/org/springframework/restdocs/templates/asciidoctor 아래에 커스텀하여 두는데, 이 때도 파일명을 규칙에 맞게 사용해야 requestFields() 메서드, responseFeilds() 메서드 등이 이해하여 커스텀 snippet을 읽어서 문서를 만들어준다.
이 때 규칙을 찾아보면,
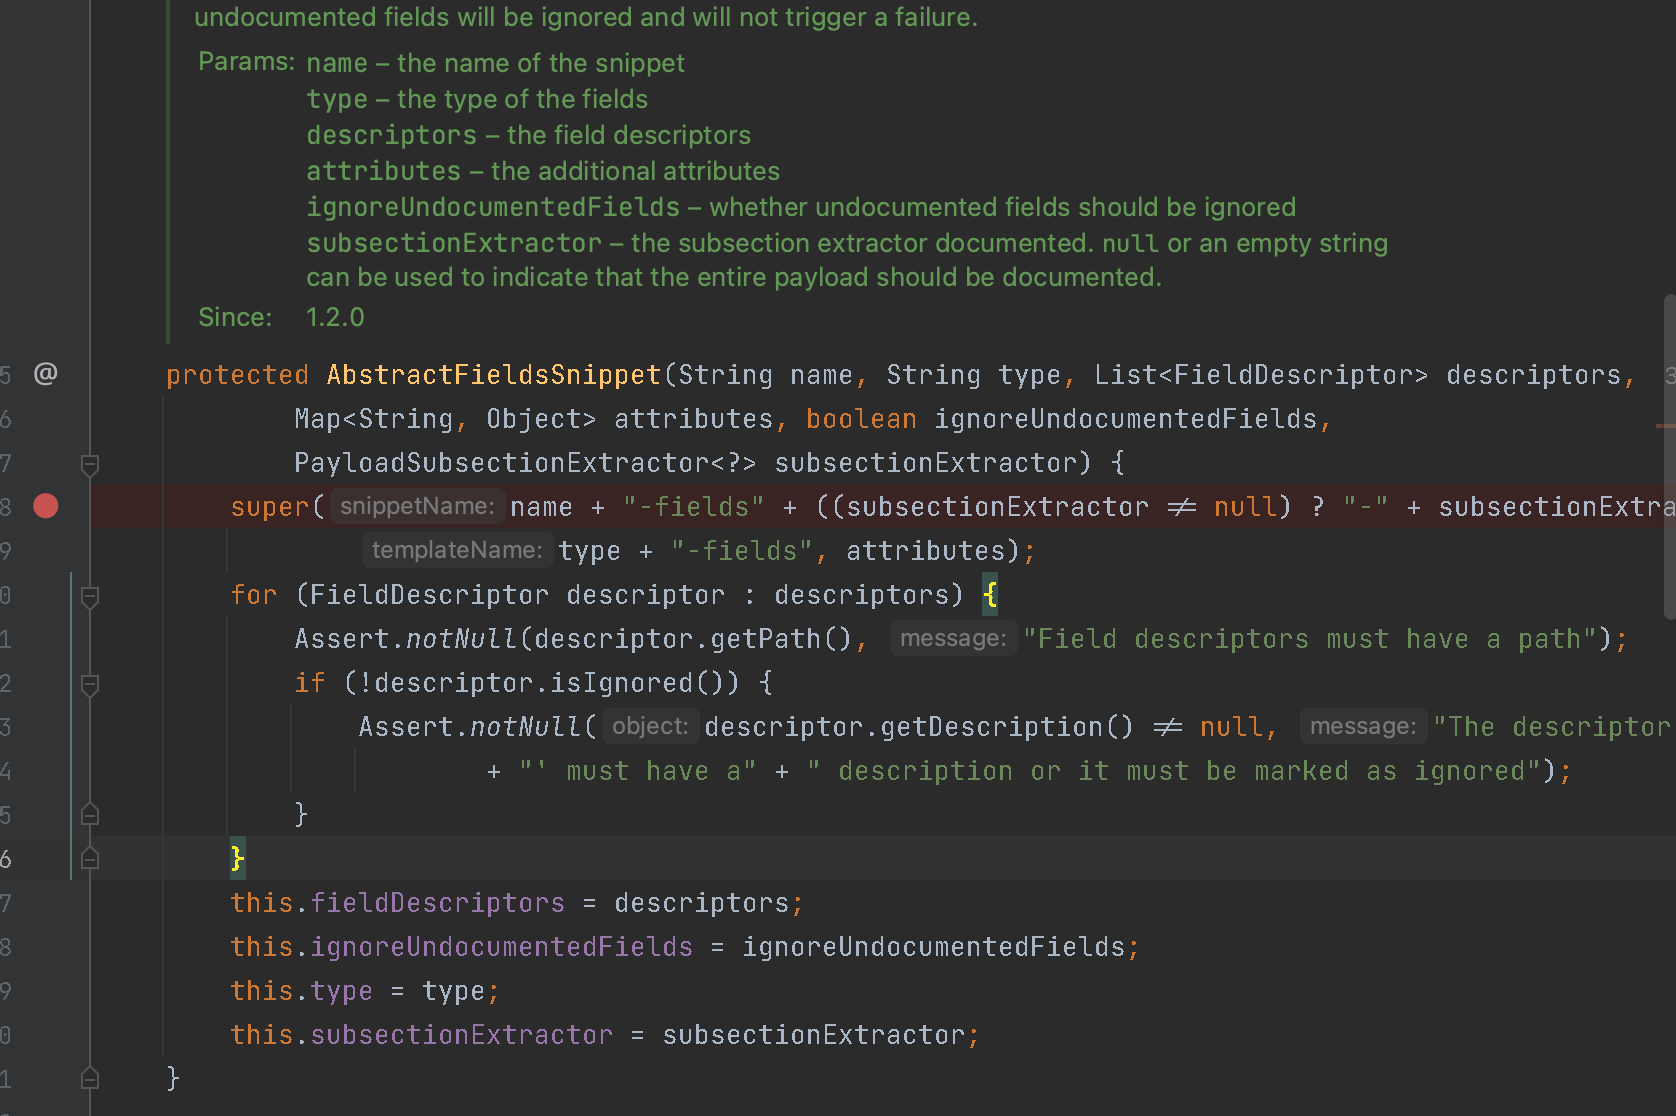
AbstractFieldsSninnpet이나 AbstractBodySnippet 이나, 생성자에서 첫번째 파라미터로 String type 또는 String name이라는 파라미터를 받는데, 이 파라미터로 super를 호출하면서 각자의 파일 이름 규칙을 만든다.
즉 body나 parameter나 fields나 snippet 파일 이름 규칙만 맞춰 커스텀하면
src/test/resources/org/springframework/restdocs/templates/asciidoctor 디렉토리 밑의 파일을 찾아 매핑해서 문서를 만들어준다.
- request(response) field 문서를 생성을 도와주는 클래스 - AbstractFieldsSnippet
- RequestFieldSnippet 클래스 - (규칙 : 스니펫 파일 이름 : {xxx} -fields )
- ResponseFieldSnippet 클래스 - (규칙 : 스니펫 파일 이름 : {xxx}-fields )
- request(response) body 문서를 생성을 도와주는 클래스 - AbstractBodySnippet
- RequestBodySnippet 클래스 (규칙 - {xxx} -body)
- ResponseBodySnippet 클래스 (규칙 - {xxx} -body)
- requestParam, pathParemeters 문서 생성을 도와주는 클래스 - AbstractParametersSnippet
- RequestParametersSnippet 클래스(규칙 : 스니펫 파일이름 - {xxx} request-parameters.snippet),
- PathParametersSnippet 클래스 (규칙 : 스니펫 파일 이름 - {xxx} path-parameters.snippet ).
예제를 통해 response fields를 내가 원하는 이름대로 커스텀 해보도록 한다.
1. custom snippet 파일 생성
파일 이름은 ys-custom-fields.snippet 이다.
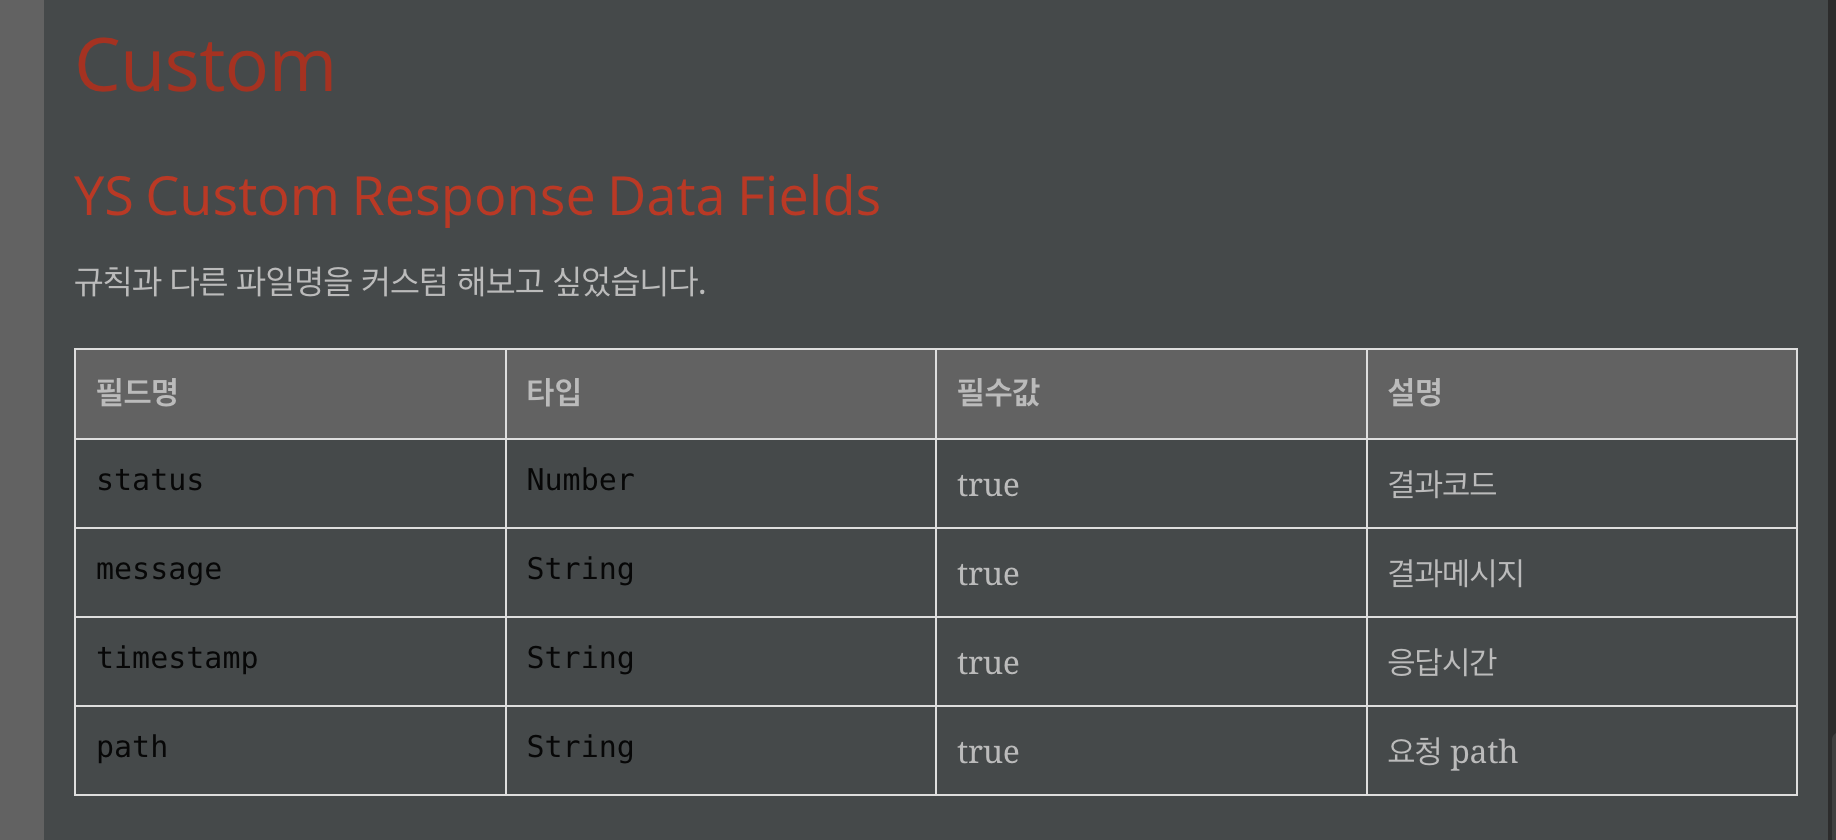
=== YS Custom Response Data Fields

규칙과 다른 파일명을 커스텀 해보고 싶었습니다.

|===
|필드명|타입|필수값|설명

{{#fields}}
|{{#tableCellContent}}`+{{path}}+`{{/tableCellContent}}
|{{#tableCellContent}}`+{{type}}+`{{/tableCellContent}}
|{{#tableCellContent}}{{^optional}}true{{/optional}}{{/tableCellContent}}
|{{#tableCellContent}}{{description}}{{/tableCellContent}}

{{/fields}}

|===
파일 위치는 src/test/resources/org/springframework/restdocs/templates/asciidoctor 에 두도록 한다.
- 필드명, 타입, 필수값여부, 설명 정도만 추가하였다.
2. 공통 에러를 보여주기 위한 테스트에 RestController 생성
공통 에러를 보여주기 위해 Test 패키지에 Controller를 생성하였고, Controller 클래스와 공통 에러 클래스는 다음과 같다.
// test 패키지이다.
package com.ys.board.domain.restdocs.error;

import org.springframework.http.ResponseEntity;
import org.springframework.web.bind.annotation.GetMapping;
import org.springframework.web.bind.annotation.RestController;
import org.springframework.web.servlet.support.ServletUriComponentsBuilder;

@RestController
public class ErrorController {

    @GetMapping("/error")
    public ResponseEntity<ErrorResponse> error() {

        return ResponseEntity.ok(ErrorResponse.badRequest("요청이 잘못되었습니다",
            ServletUriComponentsBuilder.fromCurrentContextPath().toUriString()));
    }

}

//

@Getter
@NoArgsConstructor(access = AccessLevel.PROTECTED)
@JsonInclude(JsonInclude.Include.NON_NULL)
public class ErrorResponse {

    private int status;

    private String message;

    @JsonFormat(shape = JsonFormat.Shape.STRING, pattern = "yyyy-MM-dd HH:mm:ss", timezone = "Asia/Seoul")
    private LocalDateTime timestamp;

    private String path;

}
3. MockMvc 테스트 코드 작성
@WebMvcTest
@AutoConfigureRestDocs
@TestConstructor(autowireMode = TestConstructor.AutowireMode.ALL)
@RequiredArgsConstructor
class CustomSnippet {

    protected final MockMvc mockMvc;

    protected final ObjectMapper objectMapper;

    @Test
    void customSnippet() throws Exception {

        //when
        ResultActions result = this.mockMvc.perform(get("/error")
                .characterEncoding(StandardCharsets.UTF_8.name())
                .accept(MediaType.APPLICATION_JSON)
                .contentType(MediaType.APPLICATION_JSON)
        );

        MvcResult mvcResult = result.andReturn();

        //then
        result.andExpect(status().isOk())
            .andDo(document("ys-custom-response",
                customResponseFields("ys-custom",
                    fieldWithPath("status").type(JsonFieldType.NUMBER).description("결과코드"),
                    fieldWithPath("message").type(JsonFieldType.STRING).description("결과메시지"),
                    fieldWithPath("timestamp").type(JsonFieldType.STRING).description("응답시간"),
                    fieldWithPath("path").type(JsonFieldType.STRING).description("요청 path")
                )
            ))
            .andDo(print());
    }

    // 파일명마다 규칙이 있음. fields 인 경우에는 AbstractFieldsSnippet에서 'name'-fields 로 구성함
    public static CustomResponseFieldsSnippet customResponseFields(
        String snippetFilePrefix, FieldDescriptor... descriptors) {
        return new CustomResponseFieldsSnippet(snippetFilePrefix, Arrays.asList(descriptors), true);
    }

    public static class CustomResponseFieldsSnippet extends AbstractFieldsSnippet {

        public CustomResponseFieldsSnippet(
      String type, List<FieldDescriptor> descriptors,
            boolean ignoreUndocumentedFields) {

            super(type, descriptors, null, ignoreUndocumentedFields);
        }

        @Override
        protected MediaType getContentType(Operation operation) {
            return operation.getResponse().getHeaders().getContentType();
        }

        @Override
        protected byte[] getContent(Operation operation) throws IOException {
            return operation.getResponse().getContent();
        }
    }

}- AbstractFieldsSnippet를 상속받아 구현한 Custom Class를 만든다.
- 이 클래스는 우리가 지정한 파일 이름을 사용하기 위해 직접 parameter로 파일 이름을 지정하여 생성한다.
- 위에서 설명했듯이, AbstractFieldsSnippet은 super를 통한 호출에서 type(또는 name) 이라는 파라미터에 뒤에 -fields를 붙인다.
- 그로 인해 ys-custom 을 넘겨주면 ys-custom-fields라는 파일을 찾아 매핑해주는것이다.
- responseFields() 메소드 처럼 static method를 만들어
- 만든 snippet 파일 이름은 ys-custom-fields.snippet이며, 이 때, 인자로 snippetFile 이름의 -fields를 제외한 값을 입력한다.
- 위에서 설명했듯이, AbstractFieldsSnippet은 super를 통한 호출에서 name이라는 파라미터에 뒤에 -fields를 붙인다.
4. 생성된 파일 확인
이렇게 상속과 Custom을 이용하여 여러개의 snippet을 만들어 필요한 필드 등을 정의할 수 있다.
이걸 잘 이용하면 enum과 link도 가능하다.
- request(response) field 문서를 생성을 도와주는 클래스 - AbstractFieldsSnippet
- RequestFieldSnippet 클래스 - (규칙 : 스니펫 파일 이름 : {xxx} -fields )
- ResponseFieldSnippet 클래스 - (규칙 : 스니펫 파일 이름 : {xxx}-fields )
- request(response) body 문서를 생성을 도와주는 클래스 - AbstractBodySnippet
- RequestBodySnippet 클래스 (규칙 - {xxx} -body)
- ResponseBodySnippet 클래스 (규칙 - {xxx} -body)
- requestParam, pathParemeters 문서 생성을 도와주는 클래스 - AbstractParametersSnippet
- RequestParametersSnippet 클래스(규칙 : 스니펫 파일이름 - {xxx} request-parameters.snippet),
- PathParametersSnippet 클래스 (규칙 : 스니펫 파일 이름 - {xxx} path-parameters.snippet ).
RestDocs 문서 링크 걸기
html 에 a tag 를 사용시 외부 링크 뿐만 아니라 hash 를 이용한 내부 링크가 가능하다.
- index.adoc 문서에
[[태그명]]을 이용하여 다음 태그를 추가한다
== User

[[user]]

[[resources-post-create]]
=== create

==== HTTP request

[[user-create]] <<<<<<<<<<<<<< 여기!
include::{snippets}/users-create/http-request.adoc[]
adoc 으로 생성되는 문서에 id=user-create 이라는 형태로 div가 생성된다.
- *주의할점은, 반드시 이동할 단락(include 바로 위라던가) 에 넣어야 한다. 허공에 넣게 되면 이동하지 못한다. *
- adoc에서는 <<>> 를 이용하면 link를 만들 수 있다.
<<태그명, 화면에 띄울 텍스트!>> 를 이용하여 작성한다.
@Test
void test() {
      ... 생략

        MvcResult mvcResult = result.andReturn();

        //then
        result.andExpect(status().isOk())
            .andDo(document("ys-custom-response",
                customResponseFields("ys-custom",
                    fieldWithPath("status").type(JsonFieldType.NUMBER).description("결과코드"),
                    fieldWithPath("message").type(JsonFieldType.STRING).description("결과메시지"),
                    fieldWithPath("timestamp").type(JsonFieldType.STRING).description("응답시간"),
                    fieldWithPath("path").type(JsonFieldType.STRING)
                             .description("요청 path, <<user-create,유저로이동!>>") << 추가
                )
            ))
            .andDo(print());
    }
<<user-create,유저로이동!>> 하면 href="url#user-create"가 생성된다.
해당 테이블의 링크를 클릭하면 그곳으로 이동된다.
html 커스텀
링크를 누르면 공통 코드 쪽으로 화면 이동이 되지만 다시 보던 화면으로 돌아가려면 불편하다.
공통 코드가 차지 하는 영역이 넓기 때문 이다.
만약 클릭했을 때 이동이 아닌, 팝업 창 등 다른 창에 내용이 나오면 좋겠다라면 다음을 이용하자.
다음은 우아한 형제들 블로그에서 제공해주는 내용이다.
ascii 문법을 보면
link:index.html[Docs]이렇게 Relative 한 링크를 연결할 수 있다.
link:index.html#user-create[유저 생성]public class UserDocTest {
@Test
public void test() throws Exception {
// ...
fieldWithPath("test").type(JsonFieldType.STRING)
.description("link:#user-create[유저 생성,window="_blank"]") // (1)
// ...
}
}(1) 위에 언급한 방법대로 외부 링크를 작성 하고 새창 열기를 위해 window="_blank" 를 선언 한다.
대부분의 문제가 해결이 되었지만, 새창이나 새 탭이 아닌 팝업창을 띄우고 싶다면?
하지만 아쉽게도 asciidoc에서는 팝업을 제공하지 않지만 asciidoctor의 docinfo 라는게 있다.
adoc 파일에 html 파일을 주입 할 수 있게 해주는 속성.
- docinfo 는 private, shared, head, footer 등의 조합을 할 수 있습니다.
- private 시 특정 파일 이름을 선언해서 사용 가능합니다.
- shared 선언 시 docinfo.html 을 기본적으로 가져다 사용합니다.
- head 는 private-head 또는 shared-head 로 선언이 가능하며 선언 시 head 위치에 붙습니다.
- footer 는 head 와 반대입니다.
- docinfo1, docinfo2 등등 도 있는데 이것은 alias 입니다.
a tag 에 class 속성을 넣고 클릭 시 html에 선언한 javascript로 팝업을 띄운다.
참고로 head에는 style도 넣을 수 있기 때문에 자신만의 독특한 스타일의 문서를 만들수 있다.
index.adoc
ifndef::snippets[]
:snippets: ../../../build/generated-snippets
endif::[]

= API Document
:doctype: book
:icons: font
:source-highlighter: highlightjs
:toc: left
:toclevels: 3
:sectlinks:

:docinfo: shared-head // (1)
팝업을 사용할 adoc 에만 선언
- docinfo 선언
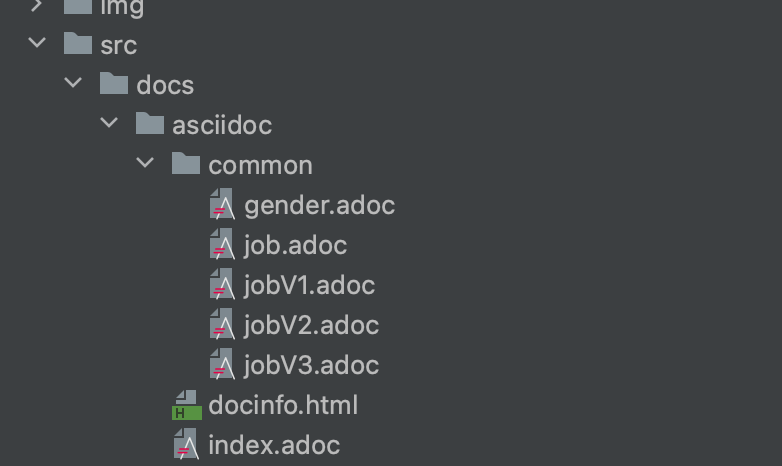
common/job.adoc 생성
include/common/custom-response-fields-jobs.adoc[]hash가 아닌 별도 파일로 변경한다. 이렇게 하는 이유는 팝업에서 해당 내용만 보여주기 위함이다.
개선 후 docinfo.html 생성
<script>
    function ready(callbackFunc) {
        if (document.readyState !== 'loading') {
            // Document is already ready, call the callback directly
            callbackFunc();
        } else if (document.addEventListener) {
            // All modern browsers to register DOMContentLoaded
            document.addEventListener('DOMContentLoaded', callbackFunc);
        } else {
            // Old IE browsers
            document.attachEvent('onreadystatechange', function () {
                if (document.readyState === 'complete') {
                    callbackFunc();
                }
            });
        }
    }

    function openPopup(event) {

        const target = event.target;
        if (target.className !== "popup") { //(1)
            return;
        }

        event.preventDefault();
        const screenX = event.screenX;
        const screenY = event.screenY;
        window.open(target.href, target.text, `left=$, top=$, width=500, height=600, status=no, menubar=no, toolbar=no, resizable=no`);
    }

    ready(function () {
        const el = document.getElementById("content");
        el.addEventListener("click", event => openPopup(event), false);
    });
</script>
해당 파일은 기본옵션으로 만들었기 때문에 docinfo.html 이라는 이름이 지정되었고 해당 이름과 경로는 옵션으로 변경 가능하다.
각 페이지마다 스타일과 스크립트가 다르다면 옵션으로 만들고, 그게 아니라면 이것처럼 하나만 작성하면 된다.
(1) class 가 popup 인 경우 팝업 생성
public class UserDocTest {
@Test
public void test() throws Exception {
// ...
fieldWithPath("job").type(JsonFieldType.STRING)
.description("link:common/job.html[직업 코드,role="popup"]") // (1)
// ...
}
}- role(role="popup") 은 doc 파일을 생성하면 class 가 된다.
하지만 "link:common/job.html[직업 코드,role="popup"]" 이런 부분이 반복적이며 글자 타이핑 하다가 오타가 발생할 수 있으니 코드로 관리할 수 있다.
public interface DocumentLinkGenerator {
static String generateLinkCode(DocUrl docUrl) {
return String.format("link:common/%s.html[%s %s,role="popup"]", docUrl.pageId, docUrl.text, "코드"); // (1)
}
static String generateText(DocUrl docUrl) {
return String.format("%s %s", docUrl.text, "코드명"); // (2)
}
@RequiredArgsConstructor
enum DocUrl {
JOB("job", "직업"),
JOBV1("jobV1", "직업"),
JOBV2("jobV2", "직업"),
JOBV3("jobV3", "직업"),
GENDER("gender", "성별"),
;
private final String pageId; // (3)
private final String text; // (4)
}
}해당 파일은 테스트에서만 사용하니 테스트 패키지에 작성.
(1) "link:common/job.html[직업 코드,role="popup"]" 이 부분으로 변경 해주는 코드.
(2) 링크가 없는 단순 코드 명이 노출될 수 도 있으니 링크 없이 텍스트만 노출하는 해당 유틸도 만들어준다 .
(3) DocUrl 이라는 enum 에서 pageId 는 common 폴더에 있는 파일 명.
(4) text 는 문서에 노출 되는 텍스트.
public class UserDocTest {
@Test
public void test() throws Exception {
// ...
fieldWithPath("job").type(JsonFieldType.STRING)
.description(generateLinkCode(JOB)), //
fieldWithPath("jobName").type(JsonFieldType.STRING)
.description(generateText(JOB))//
// ...
}
}